Sunday, May 31, 2009

TUTORIAL 45:


I never knew you could make your own brushes, that is sooo convenient, it really makes it your own. In order to make a good grunge brush you need a good image to work with and you desaturate it. Then you use the lasso tool to select the part of the image that would make a good brush. Copy and paste it into a new document. Then use the eraser and select the rough round bristle brush.to clean up the rough edges around the brush. THen clean up the borders of your selection so you don't see the rough edges. Then you can go to define brush preset and you can select a name for your brush.

website: http://veerle.duoh.com/blog/comments/creating_grunge_brushes/

TUTORIAL 44:


This one you use adjustment layers to change her hair from blonde to brunette or whatever. First set the blend mode to overlay. You use the channels and layer via copy, and use the magic wand tool which makes a layer that only had the hair.  Then you click on color balance, and change it to the hues that you want it to be. I can't wait till I get photoshop and can play with this, just to see...:)

website: http://www.tutvid.com/tutorials/photoshop/tutorials/brunetteToBlondeHairColor.php

TUTORIAL 43:


This tutorial was really simple but really cool. I didn't know how to do this easy task, and I think it would be a fun one to know. To change the eye color, you use the elipse tool and crop around the black part of the eye, then you simply paint (with a softer brush) around the selected part. After you painted the eye, you set the blend mode to color and then it looks realistic, You can change the eye color after that if you want by selecting the hue and saturation.

website: http://www.tutvid.com/tutorials/photoshop/tutorials/changeEyeColor.php

TUTORIAL 42:


In case I would ever need to remove a tattoo in photoshop...I can haha. First you duplicate your layer and select the healing tool. You increase the hardness of the tool and you go over the tatoo and it'll make it look like skin. You can also use the clone stamp tool and clean it up a little bit to make it look more realistic. You just blend it in, and you can use the burn tool to create shadows that would be there underneath tattoo.

website: http://www.tutvid.com/tutorials/photoshop/tutorials/digitalTattoos.php

TUTORIAL 41:


I looked at this tutorial when I was making the image with fire and I was trying to create smoke. It took forever, and I did not know what I was getting myself in to. The smoke was so hard to create, and time consuming. But I think the one I did turned out pretty good, I could have made it a little more realistic, but the picture itself didn't look uber realistic so I thought it would match better if it didn't look perfectly like real smoke. What I learned was that you make a doodle, you liquify it and distort it, and then you click on effect and hit fade liquify, and you do that to 50%, and you keep repeating and repeating and repeating until it looks how you want it. A long process.

website: http://noscope.com/journal/2007/05/photoshop-howto-smoke

Sunday, May 24, 2009

image assignment:


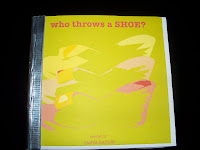
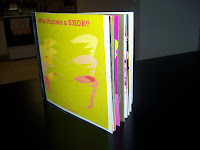
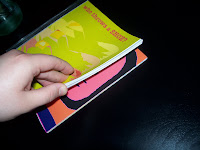
This image assignment was definitely my favorite project. It was also, one of the most stressful, it's funny how those two always go hand in hand. Not only did I learn soooo much about photo shop (I was completely intimidated and photoshop illiterate) but I also kind of found a style of my own. My designs seem to push the envelope and stand out. I used many bright colors, and creative ideas. Most of the images I created in the beginning were the "easy" ones, and I was shootin em out like crazy. When I got to about 10 I started the more difficult ones (which I am glad I waited, because in the beginning of this project I was nowhere near ready to start the more complex concepts) and I started learning more and more. I was really get into it, and then I was at number 25, and I didn't want to use the easier ones I started with in the beginning, however, I was running out of ideas. So I stopped doing this project for a couple days, so I could get some good ideas and revamp myself. After I did that, I had a bunch of creative ideas, and I didn't even use many of the easy ones. I created the book by stapling all of the pages together, and then I added some cloth duct tape on the binding of the book. It looks kind of like those books you read when you're younger, or the ones your parents read you when you go to bed. I am really excited about the finished product, I learned so much and I had a lot of fun with it. 


TUTORIAL 40:

This tutorial shows how to make a women look like she's on fire haha. The part I really took from this tutorial is that you can insert and image within another image, and then warp one of the images to fit the other one. Like I've said before, I know photoshop can do anything, I just don't have any idea how to do any of those things. This seems simple enough that I could actually do this, and the effect it has is pretty awesome.

Website: http://psd.tutsplus.com/tutorials/tutorials-effects/how-to-create-a-flaming-photo-manipulation/
Link: how to create a flaming photo manipulation